Ford Muscle Cars Tech Forum banner

67 Mustang Coupe WIP

18K views 44 replies 9 participants last post by  Is1BadFord  
#1 · (Edited)
Hey guys...

It's been awhile since I posted. Life has conspired against me in ways I can't begin to describe lol, but about a year ago Brian (Pete) and I picked this car up as a driver for me, with the side intention for it to be a platform for testing products and advertising the new company (Home). As some of you guys know things got a little (massive understatement here) rough for me in the interim lol, necessitating giving up a lot of the plans I'd made...not to mention many of the parts and pieces I'd collected. It wasn't long ago that the whole car and all the remaining parts were up for sale on craigslist. Then, as luck would have it...some bad news finally turned into good news. My loan company for my truck (01 Tahoe) are complete and total asshats. I'd fallen one month behind, and while I was making payments every month after like clockwork, I couldn't catch that one month up. These guys would call me 2-3 times a day, five and six days a week. When I'd finally answer the phone, I'd be harassed with 'Who can you borrow the money from?' or 'What can you sell to make your payment?'. It was absolutely pathetic. I'd get text messages saying 'Call this number by 5pm if you want to keep your truck'. Keep in mind, I was never more than one month behind. So, I called them last week to make my payment, and the manager pops off with 'Well, unless you pay the full amount due ($750), we're going to take the truck.' I said 'Uhh, I have one payment...if I could afford to pay the full amount you (*$)& idiot, I'd have already paid it!', to which he replied 'Who can you borrow the money from?'.

I went off.

Basically, I told him if he could find the truck he could have it...and that I'd pay a lawyer to take him to court for harassment and breach of contract before I paid him another freakin' dime in truck payments. On top of that, I wished him good luck reselling a 10mpg lifted SUV in this market, and informed him that the only reason I hadn't filed bankruptcy yet was, in fact...that I wanted to continue to pay for the truck lol. In the process of screaming at this moron, I stepped outside, and saw my poor, neglected Mustang sitting beside the tree it had taken residence under...and it occurred to me that I'd just throw a motor in it...and kill two birds with one stone.

At which point I hung up the phone and got to work.

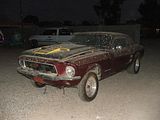
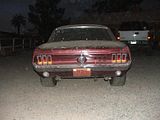
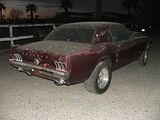
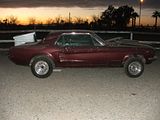
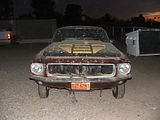
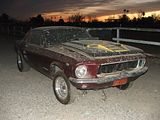
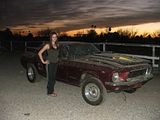
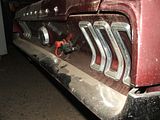
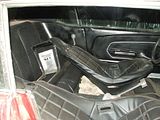
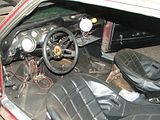
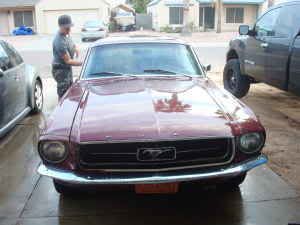
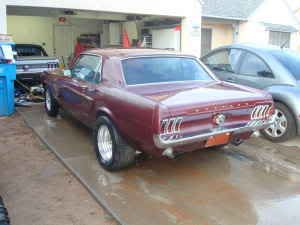
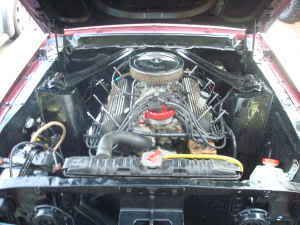
Before I get into what the current plans are...I figure you guys might want some back history on the actual car. We'd picked it up off Craigslist for a bit too much money lol. Both Brian and I were sort of blinded by the perks the car had, and overlooked a few rather real drawbacks. The perks being what was supposed to be a built C4 with a 3500 stall, 4.11 geared rear end with a 'locker' (which turned out to be either a spool, or welded spider gears...not sure yet), nice new Weld Draglites and new BFG tires, and a semi built 302 that was only supposed to be 500 miles or so old, which included 'ported' 289 heads (ha!! that was a crock), roller block and an 'F' cam. Matter of fact, here's the original pictures and ad text:

Image
Image

Image
Image


This 67 mustang is unique with a brand new 5.0 liter roller motor out of a 1988 fox body. It is a mechanically sound car with a straight body that runs strong and fast, but needs painted despite the positive compliments it receives. Starting in the rear with Richmond 4.11 gears and posi rear end, full dual exhaust with 3.5” chrome tips, flowmaster mufflers, and hooker headers, strapped on to a 302 rolled out with new ford mototsport lifters, new hardened push rods, pushing new roller rockers on freshly machined 53.5 cc ford heads ported out, oversize valves, screw-in studs, Ford mustang valve covers, new TRW forged pistons with chrome rings, new f-303 ford motorsports camshaft, fresh crank, new high volume oil pump, new high volume water pump, new radiator , new trani cooler, auxiliary electric fan, Mallory ignition system, high voltage super coil, new starter, new solenoid, new ignition, new brakes, brand new weld wheels and tires all around, nice interior with custom original white faced gauges and red back lighting, pistol grip quarter-stick shifter, C-4 trani, with new Daaco 3500 stall converter, holley red electric fuel pump, holley 700 double pumper carburetor, edelbrock performer intake, and probably more than I can’t think of. I have a file full of receipts and would be happy to give any more information that is needed about this car. I would love to be the one to finish this car, but unfortunately I have to part with it despite how much I love it. Please call Jeremy for any questions at XXX-XXX-XXXX. Thank you for looking.
The poor kid wasn't exactly trying to take us. He genuinely believed the car was worth what he was asking. He'd been lied to and taken in by local vendors (in particular, Loper's Performance) as well as people on the internet for a pretty large sum of money. Once we picked it up though...it wasn't long at all before the issues began rearing their heads.

A quick overview of the problems...the wiring was shot, steering was setup wrong, power was inconsistent (although it always felt 'strong'), and most importantly...the transmission wouldn't shift properly, which required a new valve body (I picked up a forward manual online for a pretty decent price). We found out that this was necessary due to the car not shifting at the track. 3rd gear wouldn't engage until you let off the throttle completely. It still managed a 14.60@95 (even though the carb wasn't opening all the way either)...so we had hope to get into the mid/low 13's once we figured out the trans. Since I HATE automatics to begin with...having to redo the valve body under the car was a pretty major annoyance. Once we got that settled, we took it to the track with high hopes...and ran a whopping 14.09@96, and then then a 14.00@97. The thing was in valve float by 5500rpm, and if I loaded the convertor at all it would bog badly before finally taking off. The best runs were made leaving off idle. The final pass of the night was 15.32@91, at which point I trailered it and we took it home.
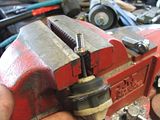
At that point I decided to rip the motor out, and go through it to see what we had actually bought:


A virtual dollar if you can see what's wrong with this picture. Yep, blown head gasket. On top of that, the pushrods were way too long, the springs appeared to be stock (for 1967), and everything was assembled in such a haphazard manner I couldn't believe it ran at all. So, we decided to do some thinking about which direction to go with the car. We had plans for a 'big motor' in the works already, and couldn't decided whether to run the 302 some more, or to revamp the car to handle the rather large power increase, and run with that. In the interim we moved the battery to the rear, installed a shutoff and charging posts, cleaned up the engine compartment, and were in the process of setting it up with a Haltech EFI unit. We also picked up most of the extra parts we'd need to run the big motor if we decided to go that route.

That was pretty much when the the shoe fell and my life went ballistic lol.

Anyhow, fast forward to today. Plans are a to go through a stock 86 short block we picked up for $200 (supposed to be already freshened with new rings and bearings), to which we'll add a Lunati 51016 HR cam, Stealth intake, and the old 700DP we have laying around to get the car running. For heads we're using Brian's old worked GT40's...that are lightly cleaned up with oversize 1.90/1.60 valves (yes, we'll be cutting the pistons =p). Compression should be just over 9:1. All that earthshaking power (yeah...I'm not serious there) will be mated to a McLeod scattershield, 13lb flywheel, and a proshifted Liberty T5 (3.35 first). The rear end's staying the same with the 4.11's.

Hopefully...it'll get up and go to the tune of low 12's, or even quite possibly better when it's all said and done.

For now though...I'll leave you guys with some additional pictures of the car in various stages of assembly, both past and present (I'll try to keep things in order chronologically), cable clutch conversion pictures, as well as a few images of the block plate we've built to mount the motor rather than stock type motor mounts. Once the big motor goes in down the road, we're going to need all the header room we can get to clear the accufab 2" primary longtubes =D.


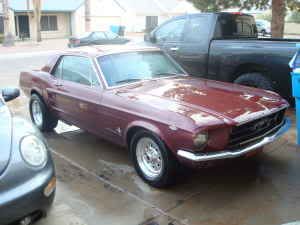
And, the more recent stuff (like, this week):


Yes, it was covered in bird crap lol. Ignore the 4 eye hood laying on it. I'd picked it up years ago for a friend that never got it from me...and just don't have the heart to throw it away.


Here's a few images showing how I connected the cable clutch. First step was to thread (1/4-28) the crimped on 'button' that retains the clutch cable in a stock 5.0 style quadrant. Then we simply attached a heim with a stud attachment (normally used for race car throttle linkage). At that point we drilled and tapped the already modified (I welded 2.5" or so of 1/4" thick steel above the pivot point) pedal to accept the 1/4-28 stud off the heim. The final picture above shows the loosely installed assembly, and no, the cable isn't normally like that. It actually pulls quite straight and true.


Here we have a couple pictures showing the firewall support I rigged up for the cable. Basically the idea is to spread the load of pedal engagement across a wider area of firewall, limiting flex. I just used a piece of 1/4" thick aluminum and cut/drilled/ground/filed it into shape.


Block plate. Basically it mounts BEHIND the bellhousing, allowing either engine or transmission swaps without hassle, but more importantly, allowing us to manipulate the motor placement to easier facilitate transmission fitment, as well as motor placement for header clearance etc. Most importantly though, it takes ALL the stresses introduced to the cylinder walls by stock type motor mounts when under heavy load, and eliminates them completely. The front of the motor will be similarly mounted. The lower ears slide between the frame rails and align with mounting brackets attached for that purpose. Simple, yet worth its weight and more in benefits.

So there we have it. We're shooting to have this thing running within a couple weeks. Hopefully events work with me for once instead of completely against me eh? The amazing thing is that out of pocket cost will be nearly zero (which is a good thing...). That being said, I certainly wouldn't be able to do this without the help of Brian (Pete), Joe (wildcobrar), Tim (Sportsroof1970), and Jack (RS351Capri), and James (cammerstang1965). Both morally and sometimes even financially these guys have helped me stay interested and moving forward in ways they probably don't even realize. Thanks also goes out to Jay (Allen of course!), not for any part he's played in this project where it's sitting now...but for the part he's played in my overall development as a builder, and the future plans for this car. Knowing the right thing to do from the wrong isn't always easy...and while I certainly don't have all the answers to my questions...I'm far better equipped to find those answers just for knowing him, let alone being honored to call him a friend.

More as it happens...I'll be sure to keep you guys posted!

Cris
 

Attachments

#3 · (Edited)
Re: 67 Mustang Coupe WIP (PICTURE HEAVY!!)

Damn! What a project!

Sorry you got stiffed on it when you picked it up , but I'm glad that you dropped the phone and took her back into your arms :)

Things are looking good!

Thanks FE =D. It's good to be back in the game lol.

Just out of curiosity mikelonis...what needed edited in the thread, and how did my wife get reattached at the bottom lol? (Edit- nevermind...you made the attachment to make an icon for the thread lol...)

Cris
 
#5 ·
Re: 67 Mustang Coupe WIP (PICTURE HEAVY!!)

Good to see you back Cris....I oftened wondered what had happened to you..Always look forward to another drag oriented mustang going together..Keep us posted on how it does good or bad! :D
P.S give that poor car a wash!
Thanks man...pretty much life happened lol.

It's been washed...but it probably won't be 'clean' until it's ready to start driving it lol. I'm putting the steering column back together today, cleaning the interior (since it won't need messed with anymore), installing the seats, and then concentrating on getting the engine bay finalized in preparation for the new motor and trans setup.

Should be a fun ride when it's all said and done =D.

Cris
 
#6 ·
Re: 67 Mustang Coupe WIP (PICTURE HEAVY!!)

Well!!

Got the cable gas pedal setup in tonight...but I'll probably need a longer cable. My setup...both cable and pedal, is out of an 84 fox...so something from a 70's/80's Lincoln (longer hood lol) may work out ok.
Anyhow, thanks to Jack we've now got the transmission down. Apparently he'd picked up a pro shifted T5 sometime last year. Turns out I've got enough extra stuff he needs that he'll make a straight swap =). So gear changing's down, and all that's left is headers. Parts list as it stands goes like this:

Motor:
- 86 5.0 short block
- Lightly cleaned up GT40 heads w/1.90-1.60 valves
- Stealth intake
- 700cfm Holley DP
- Lunati 51016 HR cam (.477"/.502" 214/221@.050) with shimmed lifters
- Stainless 1.6 roller rockers
- 1 5/8" longtube headers of some sort
- 2.5" exhaust with Flowmasters for now, but I've got a 3" setup with Flowmasters and dumps that I can make fit down the road

Trans:
Liberty Pro Shifted T5 w/3.35 1st. D&D shifter
McLeod T5/Tremec Scattershield
13lb Chromoly Flywheel
ACT 6 puck copper/ceramic clutch/pp (looks like a Spec 3 only red lol)

Rear:
4.11 geared spooled 8" w/28 spline axles

Car should weigh right at 2900 with me in it.

So what are you guys bets to what it'll run =D?? I know of similarly setup fox's running in the low 12's with a bit more weight. Wildcobrar in particular has a friend that runs a fox (read: heavier) with a very similar setup, only poorer stock heads, a similarly sized (smallish) hft cam, and 3.73 gears. That car is solidly in the 12.50's. For myself, I'm hoping for mid 12's out of the gate (after the shakedown runs and getting situated of course!), and possibly high 11's with tuning and a few small parts changes.

Never know of course...till you're crossing the lights lol.

Cris
 
#7 ·
Re: 67 Mustang Coupe WIP (PICTURE HEAVY!!)

For some reason the older stangs don't seem to run quite as quick as the fox's with similar equipment..I'm not sure if its aerodynamic drag or more drag in the drivetrain (rear end or brakes) but at least that has been my experience....I hope I'm wrong but I'm guesstimating a low 13 or maybe high 12 if you can really row the gears..
 
#8 · (Edited)
Re: 67 Mustang Coupe WIP (PICTURE HEAVY!!)

For some reason the older stangs don't seem to run quite as quick as the fox's with similar equipment..I'm not sure if its aerodynamic drag or more drag in the drivetrain (rear end or brakes) but at least that has been my experience....I hope I'm wrong but I'm guesstimating a low 13 or maybe high 12 if you can really row the gears..
I've seen a lot of the same thing. To be honest though...I think it's more in the 60'. I doubt there's enough aero drag to make up a large difference in time, and if you really look at compared timeslips, there is similar performance all around on the big end. The 4 link setup is superior out of the box to a basic leaf spring, and is very user friendly as far as tuning it. This changes if you know how to tune your traction bars, or even better...have a set of caltracs. If you notice there's guys out there with early cars and basic stuff that just murder the track =) (many on this board!). My old 67 was a 12.30 car on sticky dirt track tires (early 90's)...with ported windsor heads, a toploader, and 4.11's. It had a much, much more serious solid flat cam though, and a bit more compression (still pump gas). I never lost to a fox. 5.0's at the time were 'fast', but then again...13 seconds was the bar =D (now it's 12.0 lol). It was back then that I learned the benefits of a soft bottom end and high revs to win races. I also learned to work the rear suspension...letting the body and axle separate to plant the weight on the tires, etc.

Guess we'll see if I still have it lol. I know it's going to take a bit to get back into the swing of things for sure. I do know that I have a superior set of heads compared to that old motor, a better intake...what's likely a much better clutch, and my tires (275/50/15 M/T DR's) probably aren't even in the same league.

Going to be fun finding out...can't wait to get this thing running and to the tree lol.

Oh, here's a few pictures of that old car for comparison sake lol. Believe me, I've got plenty of teasing about the tire fitment in the rear lol...but I was a young kid with a fast car and minimal money. I couldn't afford new rims (those cost me $50 for the pair!) to get them right!!


Cris
 
#9 · (Edited)
Re: 67 Mustang Coupe WIP (PICTURE HEAVY!!)

I wasn't aware you were already experienced with the old stangs..That should help a ton getting it dialed in and hooking...As for your old ride I think it looks awesome!..Interesting look with the bumpers removed....As for the tire fitment that was just cool back then...Check out my ride when I was 16..It's a 70 mustang coupe with a set of N-50-15s on the rear..These came off of a ford pickup so they needed adaptors to bolt up to the car pattern which added about an inch and a half on each side.When doing a burnout I would get rubber falling all over the hood and windshield..LOL ..I also for some crazy reason thought a 70 hemi challenger shaker scoop would look good on it!:eek:

Image
 
#10 · (Edited)
Re: 67 Mustang Coupe WIP (PICTURE HEAVY!!)

I wasn't aware you were already experienced with the old stangs..That should help a ton getting it dialed in and hooking...As for your old ride I think it looks awesome!..Interesting look with the bumpers removed....As for the tire fitment that was just cool back then...Check out my ride when I was 16..It's a 70 mustang coupe with a set of N-50-15s on the rear..These came off of a ford pickup so they needed adaptors to bolt up to the car pattern which added about an inch and a half on each side.When doing a burnout I would get rubber falling all over the hood and windshield..LOL ..I also for some crazy reason thought a 70 hemi challenger shaker scoop would look good on it!:eek:

Image
Hey that looks great lol. I can assure you you're not the first to think a Challenger hood scoop would look good. Only one I've ever seen lol...but not the first to consider it =D. Kind of like a shaker version of the 67/68 Cougar hoodscoop on the 427/428 GT's.

As for mine...well, I bought the car as a clapped out 6cyl shell. The back seat was in the trunk, transmission was in the back seat...engine was where the driver seat goes (no driver seat), and the damaged rear bumper was sticking out the passenger window. It was about 16 shades of primer, blue, bondo, and rust lol. A friend of the family did the body and paint for favors owed to my Dad, and the rest I pretty much did myself. That car was a HUGE learning curve. I'd already owned two Cougars (both automatics), and this was my first stick muscle car. The very first thing I learned is that hipo clutches and crappy z bars don't work together at all. I bent that thing 17 ways to Sunday, and quickly learned how to drive without the clutch (shutting the car off at lights, and starting it in first gear) when I couldn't straighten the actuator enough to get home lol. When it was all said and done that z bar and actuator would have supported a train with all the bracing lol. I never did find the real problem...probably the wrong clutch fork or the like. Anyhow though, I didn't have the money to put new bumpers on it...or a rear valance for that matter =D. I was too busy putting money into the drivetrain lol.

I certainly miss the old girl...it was totaled one night when I made a left turn in front of a 1988 1 ton Chevy Dually work truck doing 70mph in the rain with no headlights on. Neither driver nor passenger spoke English, nor were they legal so it was a total loss (liability insurance on my part of course). The car was destroyed, and I was sore for a month. It was about a year before I picked up another one and transferred most of the parts over. The second one was metallic purple (I bought it that color lol), which I eventually primered over in black, leaving purple racing stripes =D. The black car was fast...the purple one was notorious lol. It eventually got a higher compression 289 (that was fun in the 120* Arizona summers...), same heads, with a better matched and slightly more aggressive cam. I never did get it to the track though. Kids, and a wife that hated it conspired against me =/. I lost that one to a 'buddy' (I'd have trusted this guy with my kids lives...but when his parents split up he changed...drastically) when I blew the trans and had to park it at his house. He asked me if he could 'borrow' the motor to see what it would do in his old stripped fairlane at the track (I wanted to know myself of course). I never got the motor back, the police backed him and called it a 'civil' matter. The car eventually got towed from our apartments and a couple years later I found the shell at a local pick and pull (hard to miss all purple and black). Sad day lol. I'm 100% sure that car had 11's in it.


Anyhow, this current car will eventually make them look like they were sitting still of course. I'm very curious though how it will compare from the get go, and just how much of an impact my knowledge and experience (I've done a 'few' things since then lol) will have on how the relatively generic parts perform. Hopefully a pretty serious one lol.

Going to be fun finding out =)

Anyway! Sorry about the 'partial history of Cris'...but we're car guys...once we get started it's hard to shut up eh? I'm sure you guys understand.

=D

Cris
 
#11 ·
Re: 67 Mustang Coupe WIP (PICTURE HEAVY!!)

Well, I worked a bit on the trans mount today...got some brackets cut out that I'll probably weld to the factory trans mount tomorrow. Then it's a matter of drilling them square and true to the drop we want on the transmission (about 1/2" should do it). That's another bonus of the block plate mount. We can now lower the block in 1/2" increments, so as to keep our crankshaft centerline true.

Anyhow, here's a small 'walkaround' style video so you guys can get a better feel for what's going on. Still a LOT of work to do...but I think a couple weeks should cover it. We may or may not have a few surprises thrown in there as well, when it's all said and done =D.

YouTube - 67 Mustang Coupe Walkaround


Cris
 
#12 · (Edited)
Re: 67 Mustang Coupe WIP (PICTURE HEAVY!!)

Well, I got the lowering tabs mounted onto the trans crossmember. I also managed to get the motor plate fitted completely to the bellhousing. The way I did it, I can remove either the block, or trans without having to support the other piece. If I pull the motor, the bell will still be bolted to the plate. If I pull the trans, the plate is dropped, bell removed, and then the plate is set back up in place to support the block. Toss a couple bolts in it to safely secure the block to the plate and you're done.

Anyhow, here's a few pictures:


Anyhow, more as it happens!

Cris
 
#13 · (Edited)
Well!!

Got into the whole header thing this afternoon. Accufabs are nice headers...but they did (and still do...I'm not done yet) require some fitting. Then there's the fact that a couple of the things that I SPECIFICALLY required seem to have been...ummm...well lets just say they aren't there. Things like a route between the tubes for the freaking cable clutch (specifically ordered), or...clearance for my scattershield (again, specifically ordered). I expected to do some clearancing of the flanges on the scattershield, as well as minor dinging of the tubes to get them to fit...I mean, they are 2" primaries (that's damn near the size of the stock exhaust on the car). On top of that, headers aren't just bolt in and go...we all know that. But the amount of work I'm going to have to do is quite annoying, considering when it was all said and done, with the multiple shipping charges (they put the wrong flanges on there first, even though I sent in a tracing of my one off port and bolt pattern), basically $850 headers. The crappy thing is I know George would fix it in a heartbeat...but I don't have $50 a pop to keep sending them back to make sure he gets them right. Keep in mind also, the pictures below are with the headers stood off the heads with a .200" spacer (I used washers temporarily...I'll have to make something more permanent before the headers get used). They wouldn't even bolt up without the spacers, and in order to get them to do so, I'd have had to crush the #4 tube (resting against the starter housing) almost flat...and do the same to #8 (sitting against the ear of the block). That's how far off they were.

My advice to ANYONE ordering headers from Accufab...is to send in the heads (if they're custom ported like mine) and the bellhousing if at all possible.

Anyhow, all that being said...there's nowhere else to get 2" primary headers for an early car that I know of, short of a $1500 (minimum) custom, on the car fabricated set, so I'm grateful even to have something to modify if you know what I mean.

Here's some pictures:


Here you can see the washers I used for spacers. I'll fab up eight plates in aluminum, or possibly copper...that are .200" thick for the permanent solution.


You can see here that the headers 'touch' on the starter bulge, and the flange just above it. The fact that they are bolted on is decieving...there is substantial stress on them in the picture...and they'll need over 1/2" in clearancing. In a below picture you can see some of the work I did on the flange, and I'll probably heat the starter bulge up to red and beat it in with a pipe (to make a nice curve) to get most of that, then ding the tube a bit if necessary to get the rest.


Here you can see where the block touches the #8 tube. I told them I wasn't using a z-bar, and to use that space for clearance if necessary. Oh well...I'm just going to grind the block down until it fits.


Here you can see the actual block plate fitment. I had to do a good bit more grinding on it to get it to clear (and still have a bit more to go on the drivers side!). On the passenger side, we're going to weld a bit more meat in the support arm, as it's only about 3/4" wide at the narrowest point. It would probably be fine as/is (the motor will be supported in four other areas as well, not to mention the tranny mount)...but it's just not worth taking the chance.

Anyhow, tomorrow I'll bolt the dummy trans to it and into the car it goes. I need to see if the block plate itself needs to be cut down on one side or the other to center the motor properly (and fit those headers...I'm thinking the floor boards in the firewall area are going to be an issue). I would also like to make some notes as to where the plates line up so I can start fabricating frame mounts. I know this may seem like a lot of work for a driver...and what very likely amounts to a 12 second car...but the end goal is substantially more than that. Doing the work now saves me a lot of time and headache later lol. Particularly considering I can't put the new drivetrain in until the trans gets here (next week we're hoping), and I get the money for studs and pushrods (who knows when that will happen eh?). May as well get as much done towards the final product as I can lol. After the dummy fitment of the drivetrain, I'm going to do the subframe connectors, and maybe start tacking in the cage. Hell fitting that will probably be as much, or more fun than the damn headers lol.

Cris
 
#14 · (Edited)
Well!!
I solved my header clearance issues...with a torch, hammer, pipe, and grinder:


I know it looks like the clearance is tight...but there's just under 1/4" at the closest spot. I'm not worried about it touching. The only issue may be the transfer of heat to the starter area. Guess we'll see. Worse case I put some insulation around the header there. It's pretty apparent the HUGE amount of clearancing I had to do on that starter cone...which begs the question...what the )(#$*# is the #$%)($#_)$#@ starter cone so big for anyhow?!?! There's absolutely no need for it to be so large!! I mean, I guess the old style starters had that huge cone on them...but damn! What a pointless pain.

So, after I clearance the block on the other side this evening, I can set about dropping the engine and trans in the car tomorrow.

Fun stuff!!

Cris :smile
 
#15 ·
Wow that seems like alot of work on Custom ordered headers. But I have to say I would have done the same thing. Forget sending them back and spending the money.

Nice work .

James
 
#16 · (Edited)
Wow that seems like alot of work on Custom ordered headers. But I have to say I would have done the same thing. Forget sending them back and spending the money.

Nice work .

James
Thanks!!

And yeah...after three days or so...I agree.

Here's the final results:


All done...so tomorrow I'll stick the motor in the car...and see what's what from there. One nice side benefit I've noticed now that I've placed the dummy trans on the bell...is that my O2 sensor will clear the tranny. I was highly annoyed with Accufab's placement of the thing lol.

Anyhow...more tomorrow evening I'm sure!

Cris
 
#17 ·
Pretty cool Cris. I love the way you are documenting each step of the process. Still too bad about those headers, but they are monsters.

Although I initially used the stock Ford starter with my Accufabs, it was almost impossible to R&R. During a winter rebuild I swapped for a Powermaster and couldn't be happier (unless they could shrink that mammoth of a solenoid down to be proportional to the starter motor.)

Hopefully today's project will go a little more smoothly. :)
 
#18 ·
Thanks Dennis =).

I figure if someone can learn from my mistakes, or the few things I do right lol...then it's worth taking some pictures you know?

As for the starter...I picked up a CRV high torque unit that fits like a dream. No cone on it either lol...so even if I'd have had to ding the thing more...it would have still worked =D.

Cris
 
#19 ·
Well.

Lets see if I can express what I'm feeling right now in something of a productive manner.

$#*&#@_(&(*#@&y)(*y$)(&*p%(*$#_{@)($#+@#|$_+_#@$!!!!!!!!!!!!


Ok...now that that's over...let me explain.

The headers don't fit. Every tube hits SOMETHING. Whether it be the floor pan as it slants down from the firewall, the freaking FENDER skirts, the shock towers, steering box....or the frame. They all...hit...something! On top of that, the engine isn't even sitting where it should. It's about an inch above stock right now, and about a half inch over to the drivers side. I can't bolt the block to the tranny, because they won't line up. If there WERE motor mounts (God forbid), it would be even worse. If I take off the 1/4" standoff plates...the engine sits about half an inch lower before EVERY single $#)(#* tube hits. Right now I'm about to weld brackets on to the headers and say screw it, block's mounted...and figure out a way to get the tranny bolted on.
Keep in mind...nothing in the freaking thing is fixed except the trans mount...and I've got TWO inches of adjustment forward or backward there. I can move it wherever it needs to go in order to get the thing mounted cleanly. There is not only no clean hole...there isn't even a damn lesser evil. No matter where the fookin thing sits, all the same spots hit.

Seriously.

Anyhow, here's the pictures I'm going to send George at Accufab...when I tell him he may as well start a new set...cause, this set isn't working at all (which pisses me off even more, because I already dinged up the freakin bellhousing...can you tell I'm not happy???).

Image

So lets see. Number 5 hits the shock tower, 6 hits the shock tower, 7 I think actually might be clear as far as the body goes...although it's the one that hits the block (I alread knew that though), and 8 hits the steering box.
Image

Image

Image


Image

Here we go. Passenger side. Number 1 hits the shock tower, 2 hits the frame rail, 3 hits the fender skirt, AND the firewall/floorpan, and 4 hits the frame rail, and idler arm. I haven't even TRIED manipulating the steering to see what happens yet.
Image

Image

Image


Image

The only part of the whole damn thing that fits right. The collectors are BEAUTIFULLY tucked up against the floor. Figures eh? That tells me this whole damn thing is sitting JUST as they freaking intended. BLEH!!!

Image

This is just so you can see I'm not timid about 'tweaking' things. That's the littlest of four 'persuader' bars. Yes, those are hammer marks.

Image

Image

Aren't these pictures nice and soothing? Rachel (the wife) took them this afternoon. We live in what amounts to the middle of Phoenix...and there's a mated pair of hawks that live in a tree I can hit with a rock thrown from the garage door. Cool stuff.

So, there we are. I'm going to try to see if I can manipulate things any differently tomorrow (when I'm a bit less pissed and frustrated...and probably less tired), and at least get more than the top two block to bell bolts in (that's all I can get right now...the others are just a hair off...with no way to get leverage on them). If I can do that...I'll try to position things to the best possible angle, that would require the least dimpling of the headers...and take stock. It's going to piss me off something severe to have to ding up every single pipe to get this thing in the car...but I have a feeling George is going to say 'send 'em back!!', and the fact is, I don't have the money to. If I can get it close enough where dimpling the tubes works...I'm just going to demand that he make an extra pair of 1/4" thick flanges for me to bolt between the headers and heads as a spacer. I think it's the least he can do don't you?

Cris
 
#20 ·
So.

I managed to get the motor to clear the ENTIRE passenger side. What I did was put 2x4's under each header quad right at the bend, and used jacks to manipulate the motor, while keeping the bellhousing supported. This really seems to have helped. I was able to get the motor level, still maintaining a 4* rearward slant (remember, the car itself is sitting as stated before...no weight on the front end). I tried the motor mounts, and there was no chance of even bolting them up...the headers were in the way at the frame...so I had no way to actually verify the height as compared to factory. I went and looked, and I had a picture of the previously installed motor for reference...but there's an optical illusion involved due to the height of the front of the car now lol.

Here's the pictures though...tell me what you guys think:

Image

Image

Image


I think the pictures are decieving. I think it's higher...but I think it's by a very small amount, that's being magnified by the angle of the car and motor. Unfortunately I don't have 400lbs of junk to put in the front of the car to simulate a 302 with iron heads...and a complete rotating assembly etc. I'm tempted to take some 2" ratchet straps and compress the suspension in the front to simulate weight. I don't think I'm going to be able to judge correctly until then.

Anyhow, a friend is coming over tomorrow and we're going to start dinging up the headers wherever there's clearance issues. Whatever it takes to get the thing to fit where we want it. Since this is what George needs us to do so they can be fixed anyhow...we're killing two birds with one stone. We're not going to ding up anything on the car that's not either easily replaced, or eventually going to be removed.

One thing that might help, is if one of you guys can get under your 67 or 68 Mustang, and measure how far the block plate/dust cover/tranny plate (whatever you guys call it...everyone seems to have a different name lol), and measure how far it is behind the drag link. If you could also measure from the top of the drag link to the oil pan (I've got a stock oil pan in it now), I could definitely use that information as well. If I can't measure from the top lol, maybe I can measure from the bottom!! I do think I got it within 1/2"...but I just want to verify.

Cris
 
#21 ·
Enjoying following your progress:)


I took some measurements off mine and here's what I came up with.The backside of the draglink to the front side of the blockplate is about 6"(5.95 to be exact).The oil pan to drag link was hard to get an exact number,but seems to be approx 1.5".My car has a Milodon pan,but I thinks very similar to the stock pan at the rear.

Image
 
#22 ·
Enjoying following your progress:)


I took some measurements off mine and here's what I came up with.The backside of the draglink to the front side of the blockplate is about 6"(5.95 to be exact).The oil pan to drag link was hard to get an exact number,but seems to be approx 1.5".My car has a Milodon pan,but I thinks very similar to the stock pan at the rear.
That is perfect thanks!!

We actually managed to get within about 3/8" of both of those measurements. So, we pulled the motor, got a template made of the head to send to George at Accufab. As I'd said he offered to make me an additional pair of 1/4" flanges to use under my headers as standoffs. VERY cool. Turns out it's also low enough that we can get a Funnelweb in there, and it's only about 1" too high to fit under the stock hood with a Holley and air filter. It will fit easily under the forward facing hood scoop I have for the car. Kinda cool to know we've got room!

Anyhow, tomorrow I've got a bit more to do to make sure things will clear properly, and then it's just getting the motor together, the trans from Virginia, and getting her running! Hopefully just another week or so =D.

Cris


Our Philosophy on Horsepower
 
#23 ·
Hey Cris, thanks for the latest update. Sure glad that you can keep a positive attitude during this ordeal.

I think that we need to instruct you on how to modify your high resolution pics so that they are more user friendly for the boards. Also much less timely for you to upload too.
 
#24 ·
Hey Cris, thanks for the latest update. Sure glad that you can keep a positive attitude during this ordeal.

I think that we need to instruct you on how to modify your high resolution pics so that they are more user friendly for the boards. Also much less timely for you to upload too.
Ahhh...thanks Dennis! They're 1024x768. If you guys want I can start posting up thumbnails that you can click instead. I just thought it was more effort for you all to have to click on them to see lol!

Cris


Our Philosophy on Horsepower
 
#25 ·
Well, I finally got something done worthy of pictures lol. I spent a small amount of time today cutting the shifter hole in the floor. If it wasn't for the fact that I needed to be able to install it from the top, I wouldn't have had to cut it at all.

Take a look (click picture for larger image):


Not too bad =D.

So, right now I'm waiting on parts for the shortblock, and then a bit more cash for the right pushrods and studs...and we should be in business!!

Cris


Our Philosophy on Horsepower
 
#27 ·
I am going to show you a hole here in a few weeks when I ram that Verti Gate in mine. Now off to burn some more wire on the down bars. Take care.
 
#26 ·
Cris, your a maniac with the headers and block plates. I thought I had patience, you are committed!

I am dancing around with my floor pans and roll bar (its all tacked in now) and this is a piece of cake compared to your project.

I enjoyed your first stang, Frdnts too. Mine was a black 67 coupe, original sport sprint that I gooned up and jacked up. Never really ran. But I was laughing at 13 being the bar. I had a 68 fast back, factory 302 rotating mass, 4-V cast heads, good old Wiend Xcelerator with a 750, Mallory dual pts, Toploader, 4:63s with the traction bars loaded to pull posi on Drag Master poly tires. It was an honest to goodness 13:30 car on those poly tires, and I loved to smoke those big cammed 5:18 gears "12:00 second" cars on the back roads of NC. 13 was indeed the bar in the rocking early 80s, and if you were near it, you could hurt some feelings.

Frdnt post some pics of those new shoes on that ride.
 
#28 ·
Thanks man =D.

I know what you mean about 13's being the bar lol. Even in the early 90's...on the street and at the track high 12's to low 13's were still it. If you were in that range you were 'fast'. Anything more serious was insane. Now we're doing that N/A with all factory parts less the cam and intake lol. Low 12's are the new low 13's, and if you're in the 11's you've got a ride. Low 11's N/A and daily street driven is still a pretty limited club. Cool to know that at least one of our projects is there with just a little 306, and that hopefully sometime soon mine will be blowing that number out of the water =D.

Cris


Our Philosophy on Horsepower
 
#29 · (Edited)
Ok...back on topic and a long awaited update. Plans for a new motor have sort of fallen through. The big surprise that I was holding back on was an A4 based 347 (354" actually....at .070" over), utilizing my big(ger) cc High Ports. All of the grinding was on the crank to make it fit in the block lol. I took over half an inch off the center two counterweights, and the thing barely fits now. More work would be required for it to clear pistons...although, with some of the special needs of this crank...the pistons may have fit either way. The pin boss necessary was going to be fairly narrow.

Anyhow...due to money and time constraints, we decided to shelve the project for now...and just go with a more mundane Scat 347 kit (which it turns out is on back order till the end of the freaking month... :disgust:).

Would have been fun to keep telling you guys it ran mid/low 10's on the first real hit as a GT40 headed 302 though =p. That 354" motor was no holds barred...9000rpm was fully expected. Pump gas, daily drivable (and daily driven!)...would have been a blast =D.

Anyhow...here's some pictures of that very very cool block and some of the mock up on the crank:


And now...since I'm back to a stock block buildup (and am stuck waiting for the rotating assembly...), I went ahead and mounted the new fuel system and ran my line. All that remains is to sump the tank (I'm using a modified fox body sump), connect the line up...and install my cannister filter in the engine compartment. Then, in the motor goes with a little bit of wiring...and hopefully it's down the road =D.

Here's some pictures of the new system installation:

First the pump and filter. Routing is from behind the gas tank from out of the side of a sump (not installed yet so no pictures). It goes around the drivers side of the tank, enters the filter, then the pump, then on to the rest of the line down the passenger side.


Side view showing the line coming over the axle.


From there the fuel line runs up the inside of the subframe connector, and crosses over above the connection point of the subframe and connector. You can see where it begins its upward turn into the wheelwell.


This shows the routing in the wheelwell. The entrance into the engine compartment is protected with a grommet, and enters in the upper corner behind the hood hinge. I will most likely screw a layer of tin down to protect this area of the line from road debris that could be kicked up by the tires. This is a street car first, strip car second.


This shows the exit into the engine compartment. From there I'll mount my 2"x6" cannister filter, then adapt it down to 8an for my regulator and fuel log. That big hole in the firewall was for the old EFI harness to pass through.

Sooo, hopefully it'll be down the road before the middle of next month. What a long, long road this thing's taken me on. It should be well worth it in the end though =D.

Cris


Our Philosophy on Horsepower
 
#30 · (Edited)
Thanks a ton guys, that helps a bunch. I think I've finally got the hose routing where I want it. We'll have to see how it goes =D.

As for the rest of the setup...I got the tank sumped and installed in the car. Man that feed hose hangs low lol. Here's some pictures:


Tank with the preliminary holes drilled in it for the sump.


Pictures of the front and both sides to show just how inconsistent the contact area was, even slightly adjusted. I expected this however since this sump is for a fox body.


Final pattern for the holes in the sump. The instructions called for five very large holes, but I decided that more small holes would help me to a greater degree with any fuel slosh issues. There is a nice wide lip around all the edges with no holes for baffles.


And the sump istelf fully connected. The other side is for my return line when I finally get the return regulator installed. There is a 3/4" pipe run through the sump, with three 8" x 3/8" slots cut longwise in it towards the bottom and rear. The idea was to keep the rearward fittings to a minimum (as in, none) since, as you can see...there isn't exactly any room for them. I'm not really very happy with how the hose sits...but it's protected by the axle tube, and can be adjusted later.

So there we are. Tomorrow I am going to put 10gal worth of fuel in the thing and prime the pump, then flush the lines out into a bucket. At that point the last piece of the fuel system will be connecting up to the carb =D.
Sure is nice to have one more piece of the puzzle finished off. At this point we're waiting for the stroker kit, cam, machine work, and assembly. After that it's pushrods, final assembly, a bit of wiring...then initial fire and break in =D.

I'm REALLY hoping for no more than another month. Wish me luck lol =D.

Cris


Our Philosophy on Horsepower
 
#31 ·
Well, I decided to go ahead and connect the bypass at the fuel pump to the back of the tank rather than the front. I don't know what I was thinking (probably wasn't), but there's no way to attach an -8an hose to a 3/8" factory pickup lol. Sooo, I picked up the fittings from a local hose company (Granberry Supply for those who have them local...AWESOME stuff), and reconnected both the supply and the return more permanently.

Here's the pictures:


And a picture of the bypass on the pump that the return was connected from:


So, now we're down to all the stuff I thought we were down to yesterday lol.

Isn't that just how life works??

Cris


Our Philosophy on Horsepower
 
#32 ·
Hey Chris, sounds like your in the same boat as me, started a project and cant get it done because life or work is in the way. I keep saying I am going to have mine off blocks in a week or so!

Two questions, your sump looks like the one I got, the Mustangs Unlimited? Summits were too wide and didnt fit my tank grooves.

Second, what size DR's are those on the back, and rims etc.

Keep it up, mine is just simple crap, wiring the battery, putting the rear brakes and shocks on, biggest project left (and I dont have to do it) is swapping the Comp Plus mystery shifter for the Vertic Gate.

Take care, Gydyup
 
#33 · (Edited)
Hey Chris, sounds like your in the same boat as me, started a project and cant get it done because life or work is in the way. I keep saying I am going to have mine off blocks in a week or so!

Two questions, your sump looks like the one I got, the Mustangs Unlimited? Summits were too wide and didnt fit my tank grooves.

Second, what size DR's are those on the back, and rims etc.

Keep it up, mine is just simple crap, wiring the battery, putting the rear brakes and shocks on, biggest project left (and I dont have to do it) is swapping the Comp Plus mystery shifter for the Vertic Gate.

Take care, Gydyup
Yep I got mine from Mustangs Unlimited =D.

The drag radials are 275-50-15. Rims are 15x10.5 Centerline Warriors...and I can't remember the backspacing. I'll have to pull a wheel and check when I get a chance. I am very happy with how they sit in the car...and although I wanted to run a 65/66 width rear end when I switch to the 9", this fits so well I may not bother. I've still got almost 2" on the inside once I cut off those retarded extensions in the wheelwell, and the outside is damn near just inside of being flush with the outside of the wheelwell.

Here's a picture on another car when I'd just got them:


Cris


Our Philosophy on Horsepower
 
#35 ·
Soo, a small update.

My stroker kit came in earlier this week. I was quite disappointed when I opened the box to find forged pistons with FOUR freaking huge assed valve reliefs in them =/. Turns out that I had apparently ordered the wrong kit...and while it was quickly remedied, it will take them a week to get me the new (and correct!) Probes.

No worries...if there's anything I have on this build...it's time.

NOT.

Anyhow, I decided this evening since it's FINALLY freaking raining (keeps the dust down), to go ahead and mock some things up in the block. You know...stuff like clearancing for the stroker and the like. Well, you can imagine my surprise when I saw this after installing the first rod:


This is probably the fifth 289 I've measured the bores on. NONE of them were less than 5 1/8". This one is JUST shy of 5 1/16". I'm going to go ahead and bore the block (once the pistons get here), then see how they look with the rods attached to a piston. My last Scat kit in an early block had no issues whatsoever, but the block also had 5 1/8" bores.

Anyhow, I don't think this will be a problem...but when I'm wrong I will admit it. I've advised MANY people based on my experience that ONLY the earliest 5 bolt 289's have shorter bores.

This folks, is why they call it 'Engine Building' rather than 'Engine Assembling'.

Cris


Our Philosophy on Horsepower
 
#38 ·
Well, the 289 block went to the shop for boring yesterday. I'm pretty frustrated because the rotating assembly took so long in getting to me, and then I had to wait for the right pistons...so my budget isn't where it was before. So the way I'm doing it is...I'm going to have the block bored so I can go ahead and mock everything up to get the deck measurements, then take it back when I have the cash for the final machine work. The machinist literally told me that it was 'impossible' for the 302 rotating assembly I had in it before to be out of the hole (it was out .003" on #5, .006" on #8) on the drivers side, and in the hole (.003" on #1, and .001" on #4) on the passenger side...since the block has clearly never been decked...and that I must have 'mocked it up with the wrong piston' lol. I just kind of chuckled and said 'That's why I'm going to mock it up after you finish boring it with the crank, rods, and pistons that are going in it!'. He just sort of looked at me funny and finished filling out the work order.

Have I mentioned how I pretty much hate all machine shops? I wish I had the budget for this one to go to my normal shop...but I just don't. Ahh well, these guys have a good rep...I've just had enough conversations with my normal shop that he knows better than to insult me by telling me to my face that I mocked up my block wrong lol.

Anyhow, it should be done tomorrow and back here being mocked up by tomorrow evening. I'll see about getting some pictures then.

Cris